
Choosing Your Theme
Free & ProIf you are unsure which theme to use with BuddyNext - BuddyX, BuddyX Pro, or Reign - this page settles it. The short answer: you do not have to choose carefully, because BuddyNext works with any WordPress theme. Start with the free one and change your mind later at no cost.
The one thing to understand first
BuddyNext brings its own complete community interface - the left navigation rail, the activity feed, spaces, member directory, profiles, messaging, the sidebar cards, everything a member touches. Your theme does not draw any of that.
What your theme controls is the outer chrome around the community: the top site header, the footer, the base fonts, and the site-wide colours. So swapping themes changes the frame, not the community inside it.
Here is the exact same BuddyNext community running on two different themes - notice the feed, rail, and sidebar are identical; only the top header differs:
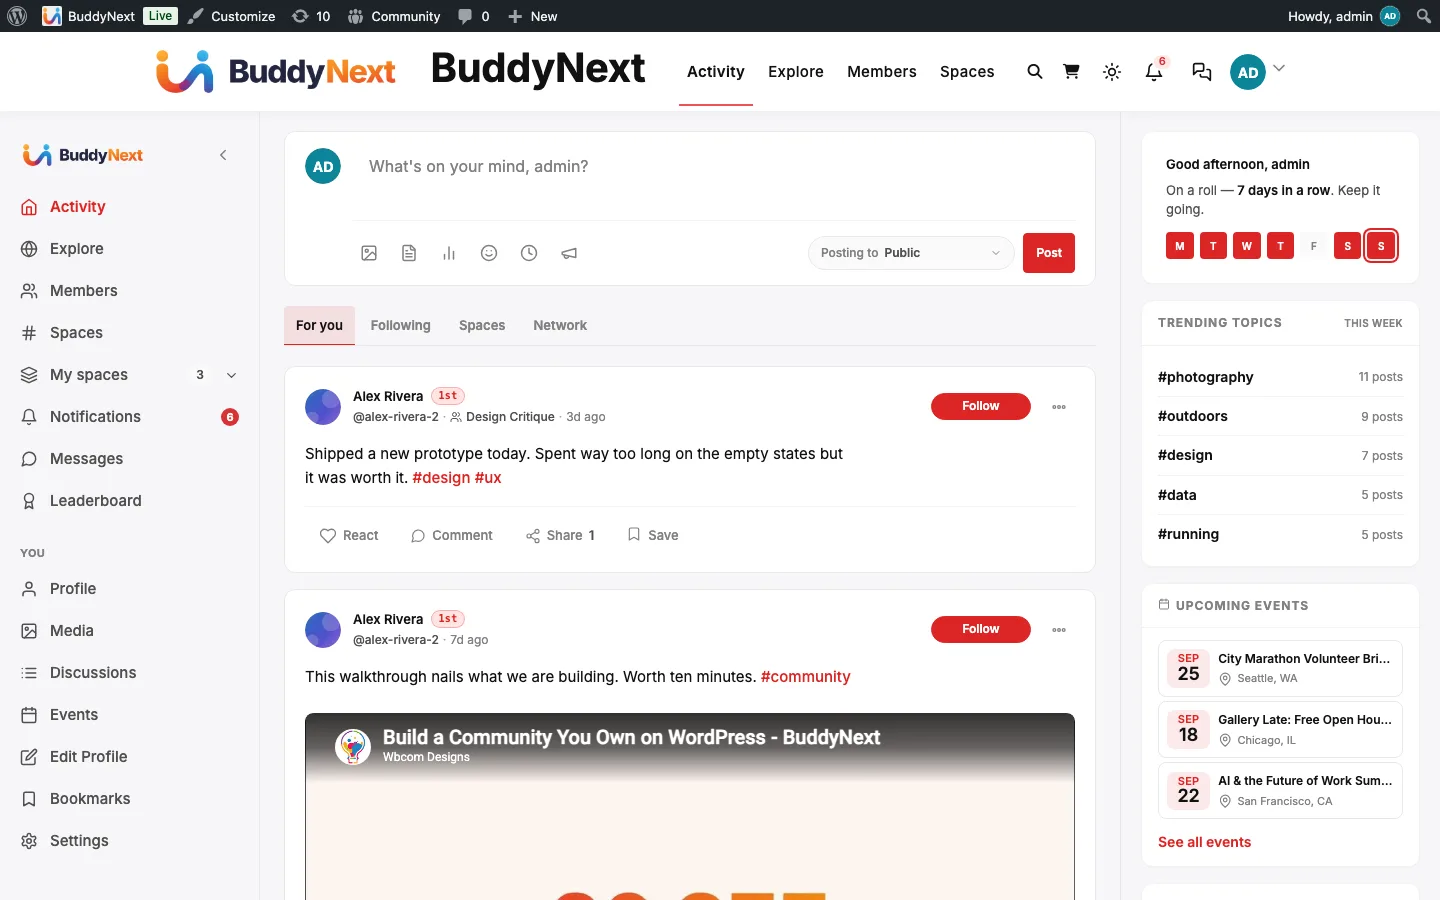
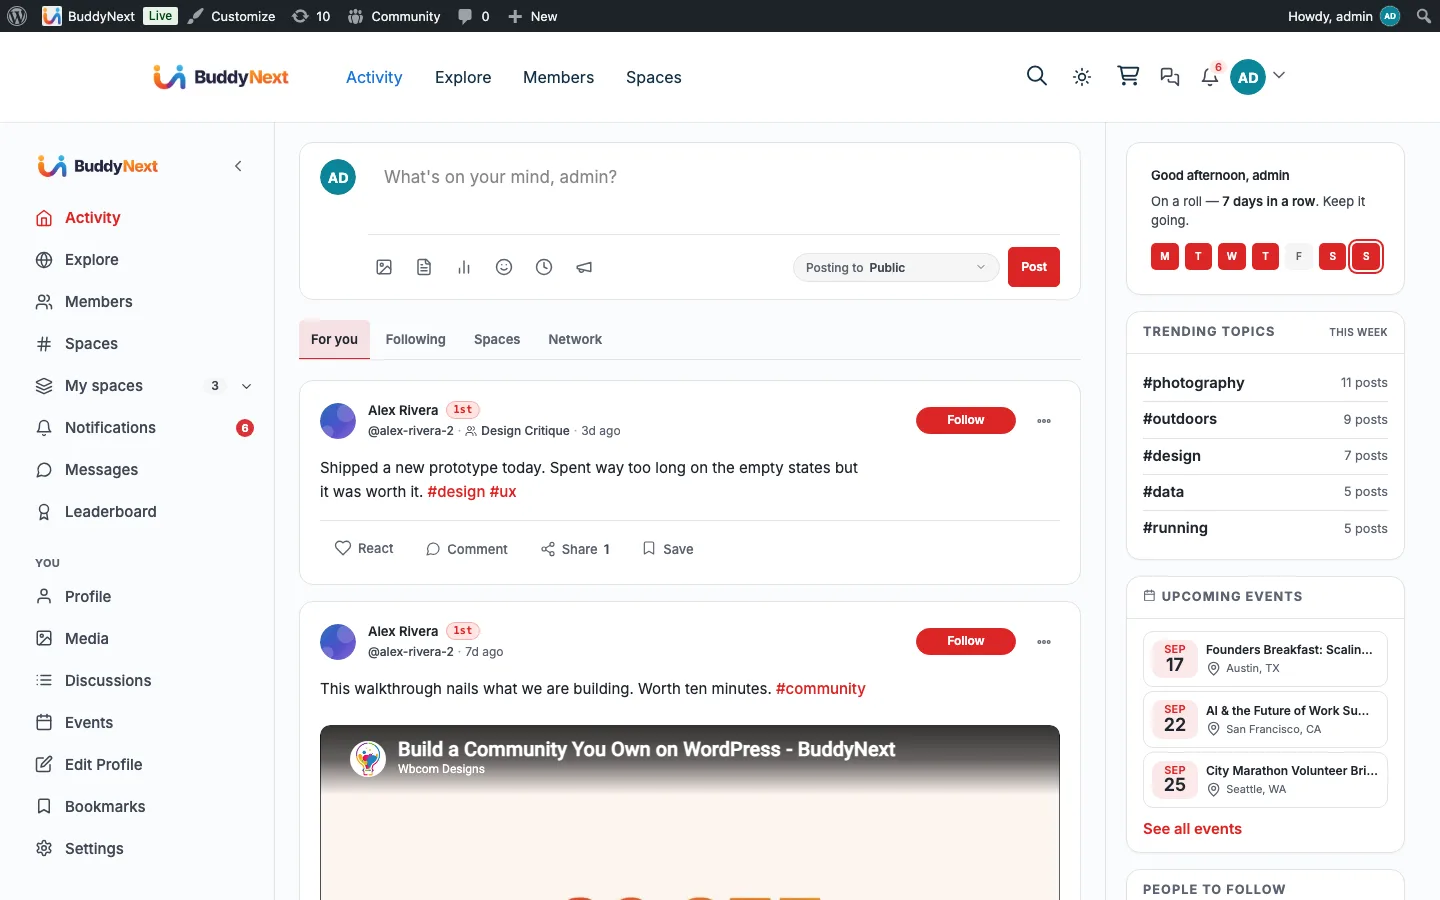
Because of this, you cannot pick a "wrong" theme for BuddyNext. Any well-built theme works - including your existing one. The three themes below are simply the ones Wbcom Designs builds and tests BuddyNext against, so they are the safest, best-integrated starting points.
The three Wbcom themes
| Theme | Price | Best for | Get it |
|---|---|---|---|
| BuddyX | Free | The recommended starting point. Purpose-built for community sites, includes a light/dark toggle, and costs nothing. | WordPress.org theme directory |
| BuddyX Pro | Premium | BuddyX plus more header/layout options, extra colour and typography controls, and additional community-page layouts. | wbcomdesigns.com |
| Reign | Premium | The most design-rich option, with many prebuilt layouts and the widest styling controls. Used for the BuddyNext demo. | wbcomdesigns.com |
All three ship a light/dark colour-mode toggle, and BuddyNext follows that toggle automatically - flip the theme's switch and the whole community, including form controls and badges, switches with it. No extra setup.
Which should I start with?
Start with BuddyX (free). It is built for exactly this, it gives you the colour-mode toggle BuddyNext relies on, and it costs nothing - so you can launch a complete community today and decide on a premium theme later.
Move up to BuddyX Pro or Reign when you want more control over the outer design: additional header styles, more prebuilt page layouts, finer typography and colour options, or the specific look of the BuddyNext demo (that is Reign). Switching is a one-click activation and your community content is untouched.
If you already run a theme you like, keep it. Install BuddyNext, and the community works inside it. You only need one of the themes above if you want their community-tuned headers and the built-in colour-mode toggle.
How to install and switch a theme
- In WordPress admin, go to Appearance > Themes.
- For BuddyX: click Add New Theme, search for
BuddyX, then Install and Activate. - For BuddyX Pro or Reign: download the
.zipfrom your wbcomdesigns.com account, then Add New Theme > Upload Theme, choose the zip, Install, and Activate. - That is it - reload any community page and it now renders inside the new theme. Your members, spaces, posts, and settings are all unchanged.
After you pick a theme
Two quick settings finish the look:
- Your logo and brand colour live in BuddyNext itself, so they carry across any theme. See Appearance and Branding.
- Light/dark default - BuddyNext follows your theme's colour-mode toggle; set the default new visitors see under Settings > Appearance.
One small note if you use BuddyX or BuddyX Pro: those themes can show both a logo image and the site-title text in the header at once. If you only want the logo, hide the site title in the theme's own Customizer (Appearance > Customize > Site Identity).
Related
- Installation - installing the BuddyNext plugin itself
- Appearance and Branding - logo, brand colour, and the light/dark default
- The Member Journey, Screen by Screen - what a new member sees, on whichever theme you choose